
N/W Roadrunner Projects No.2
Sunbeam Owners Club North Wales run
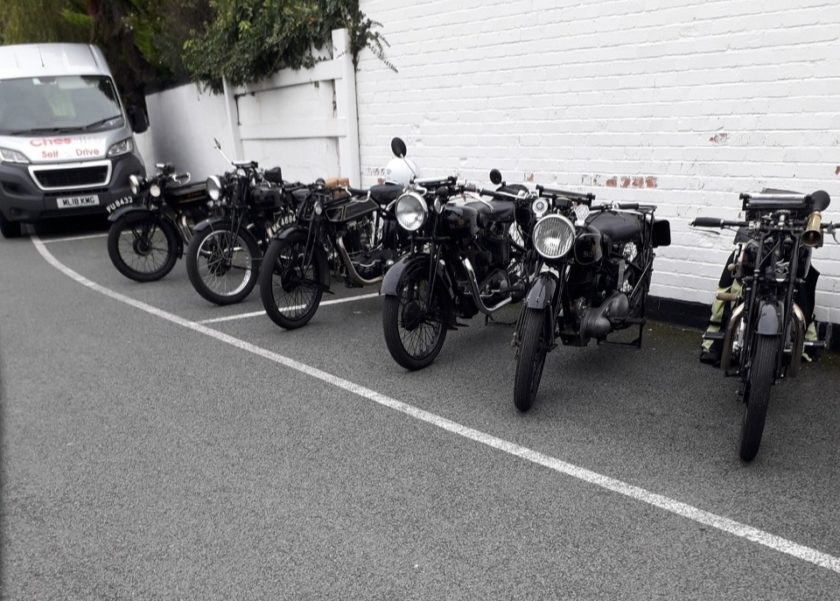
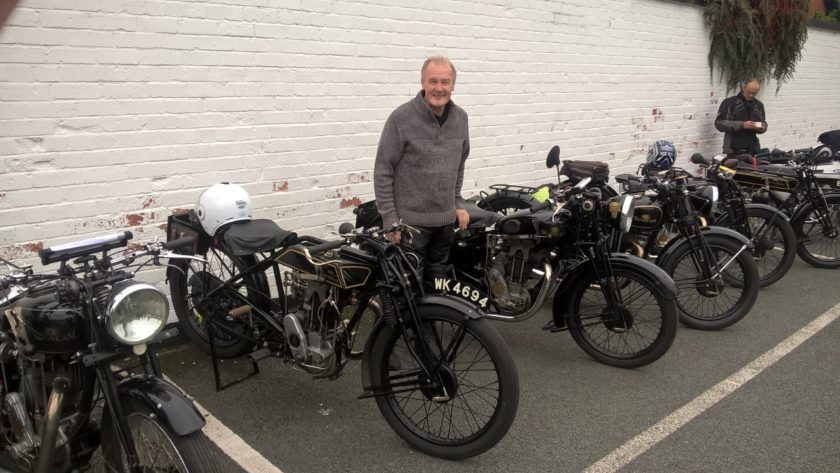
I am a member of the Marston Sunbeam club and my mate Paul Knight had arranged a lovely run in North Wales for the club. It was October and we had got over the heavy rains that had caused all the flooding over the UK and the weather was a dry pleasant day and an opportunity to get out on the bikes in a lovely part of the world with lovely riding roads along with the scenery. I persuaded my brother John to join me and he didn’t need his arm twisting much. He used my 350cc Model 8 Sunbeam and I used my 500cc Model 9.he was about to be introduced to the pleasures of riding a Gentleman’s motorcycle. We met up with group of about a dozen or there about at Bangor on Dee a lovely little village that I’ve never been to before.Then is was off through Llangollen up Horseshoe pass and on to Carrog railway station for lunch and to watch the steam trains, unfortunately about half a mile before reaching there John’s Sunbeam stopped and he had been so busy enjoying his gallop on the Gentleman’s motorcycle that we had not stopped to fill up with petrol and the bike dried up! Fortunately it was all downhill to the station and so after a small push he managed freewheeling to the lunch stop. We met up with the main group at the station and our back up driver had a tin of fuel in the recovery van. We then went into the café at the station and topped up with tea and cakes. The nearest filling station was about 200 yards past the station so that was our next port of call where we both topped with fuel. Then it was off again down some beautiful little back lanes and back to Llangollen motor museum, where we had a good look at the cars and bikes on display. After that we saddled up again and as a group headed off back through Llangollen and back to Bangor on Dee for another refreshing cuppa and to say goodbye to the rest of the group. All in all it was a splendid day and we covered about 70 miles and John got to realise just how well the Sunbeams perform and they do handle exceptionally well for a thirties girder forked rigid framed bike. I’ve included a few pics of the line up of Beams. Alex
Don’t forget we are interested in your projects:
I’m sure other members are just as occupied so let us know what you’ve been up to during the lockdown and we’ll include in the next newsletter. Alex
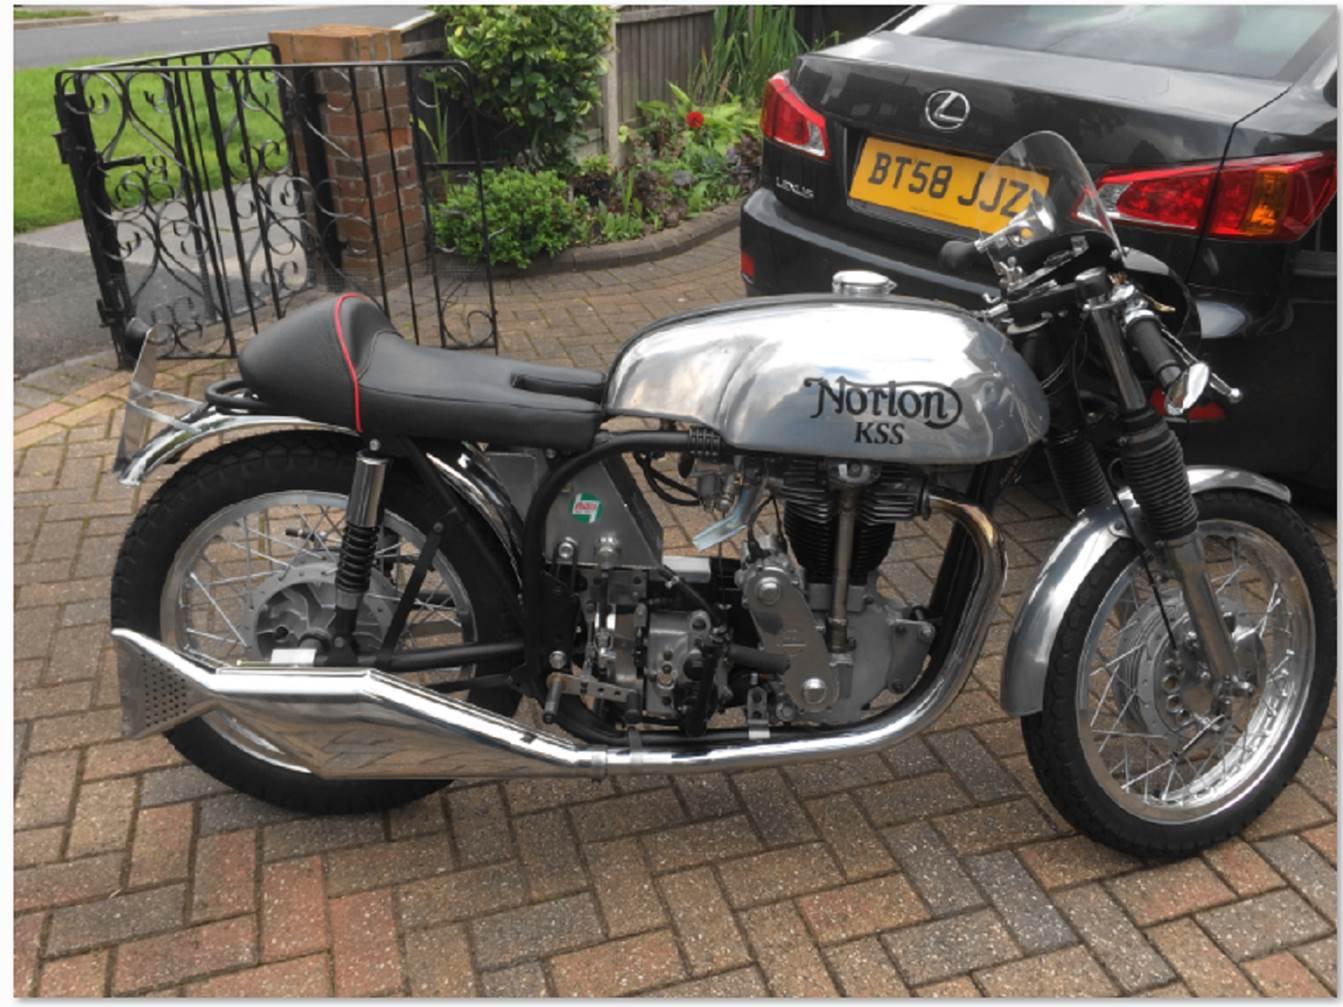
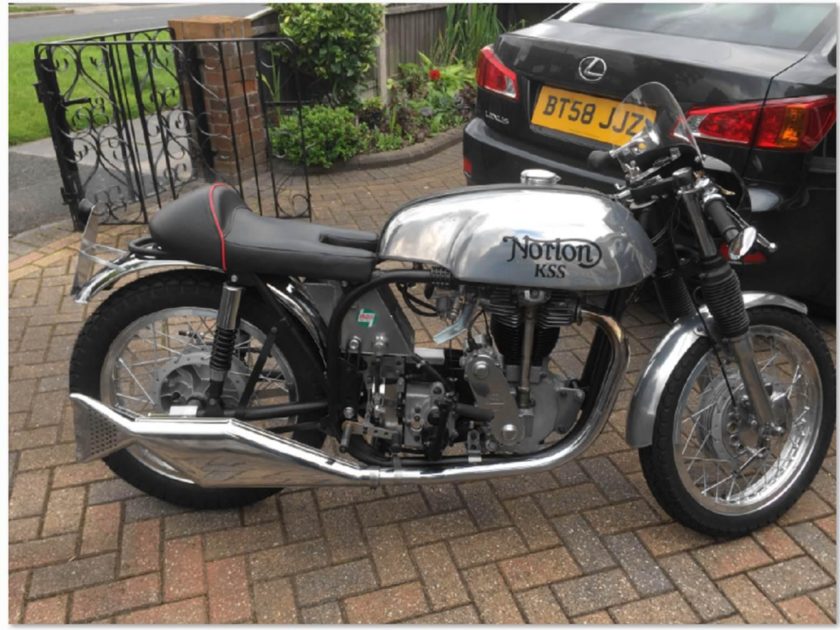
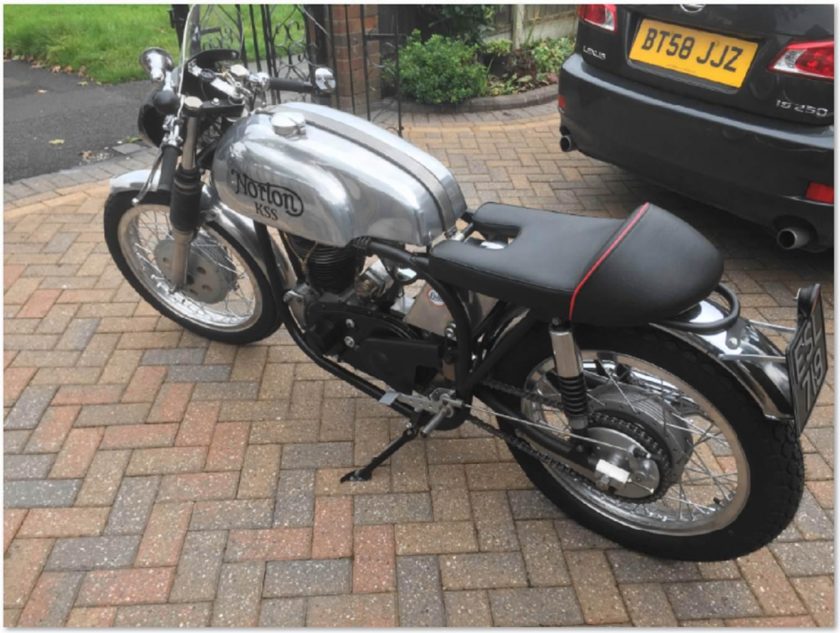
Robert White’s Norton Velocette Special
In late 2018, I spotted an advert on Ebay which I could not resist! It was for a Norton Velocette Special, based on a wideline Featherbed frame with a Velocette KSS Mk2 engine, primary and gearbox. The machine was advertised as running and complete but “hard to start” (well, it is a Velocette!) and had no paperwork, but both frame and engine numbers were clearly visible on photographs. It clearly had a lot of custom-made parts, as the original pictures showed. The numbers confirmed that the frame and running gear are from a 1959 Norton ES2 and the engine from a 1947 Velocette KSS Mk2.
Photo from the listing:

When I spotted this listing, there were only around 14 hours to go to the end of the auction and it was located so far away, I had no time to go and view it. So after much thought and a telephone conversation with the Seller, I decided to take a chance and bid for it without viewing or trial. There were several bidders, but in the end my bid won the item and I arranged for collection and delivery using a very good chap I have used before for moving machines.
Once the machine arrived, I was able for the first time to look in detail at what I had bought blind – would I regret my decision?…
After checking for oil, draining some very stale petrol from the tank and replacing it with some fresh, replacing the plug and checking for a spark, I tried to start the engine. It had no cable or lever fitted to operate the de-compressor, so it was a struggle to say the least. I could get the occasional bang but not a full start. At this stage, I had no real feel for the quirks of starting a Velocette engine, so called a pal for advice. His first question was whether I was parked on a hill, because he reckoned that was always the best place to park any Velocette…! He recommended some research on Velocette starting and after much trawling around the Internet I realised that starting a Velocette is a whole topic in its own right, steeped in myths and legends and many a sore knee.
I discovered that the generic Velocette kick start mechanism on all their models is geared such that one full swing gives you little more than one full rotation of the crank, so the position of the crank at the beginning of the swing is absolutely critical. To cut a long story short, you need to feel for compression, operate the valve lifter, ease the engine over compression, rotate the crank a little further, return the kickstart to the top of its travel again, release the valve lifter and give a full swing with complete follow through. Effectively, you are starting the kick just a little before the induction stroke and storing energy in the flywheel to carry it through induction to compression and firing (you hope).
So after fitting a cable and lever to operate the valve lifter, I tried again to start the engine. After many attempts, it suddenly started! A little advance on the timing and absolutely zero throttle opening also proved to be vitally important. Tickling the carburettor is not required and indeed, can cause too much initial flooding for a reliable start. Until I got the feel for the right combination of all the variables, I could sometimes kick it 25-30 times without success. Now, I can usually get it started on the second or third kick.
The engine sounded fairly good, but with a bit of a top end rattle (piston slap?) and rather blue oil tinged exhaust smoke. Oil return was good, all gears engaged and drove the wheel but the clutch needed adjusting as it slipped easily when I tried a few movements around my driveway. Tick over was very unstable – but at least the engine ran and the transmission seemed sound! So I had the basis of a sound and quite unusual project.
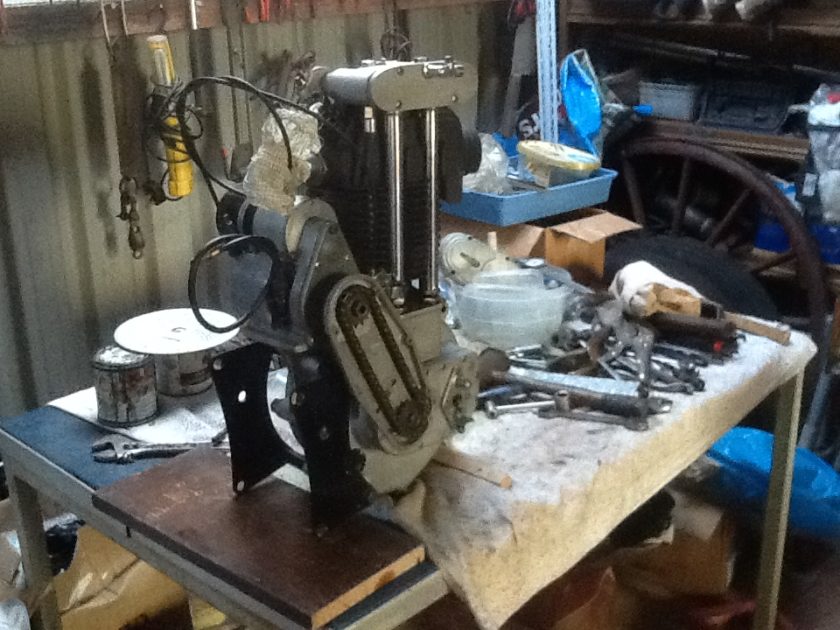
At this stage, I decided to inspect the engine more thoroughly and settle on any renovation needed. To aid in my work, I joined the Velocette Owners Club (https://www.velocetteowners.com/), obtained good quality copies of the Workshop and Parts Manuals from Grove Classics (highly recommended: https://www.groveclassicmotorcycles.co.uk/) and also found much useful information on the site of Velocette Classics (also recommended: https://velocetteclassics.com/). All three sources were also used to obtain parts later, once I worked out what I required. Most commonly needed parts are still readily available.
I stripped the top of the engine, delighting in the wonderful engineering of the OHC bevel drive. The original standard piston was still fitted, but was badly scored – as was the barrel. The rattle I had heard seemed very likely to have been caused by piston slap, as the wear was considerable. I suspect the engine had been seized more than once. The valves were seating well with minimum leakage and the overhead cam and bearings were sound. The bottom end and little end were both absolutely sound, so I decided not to strip it further. The machine came with an Amal Monobloc carburettor and this proved to be absolutely worn out, hence the unstable tick over I had experienced. I decided to have the cylinder barrel re-bored and managed to find a NOS +20 thou piston and rings. A great find!
I also de-coked the head and lapped the valves in. The stems have no oil seals but are topped with a leather washer to minimise leakage. I ended up making fresh washers using an old leather key fob and some punches.
The exhaust header was sound, but the silencer was rotten underneath, so I sourced a new full sized fishtail, fitted as standard to the KSS.
The Monobloc is not standard for the KSS engine, so I decided to source a correct pre-Monobloc from my old friends at Surrey Cycles (very helpful: https://surreycycles.com/) and it arrived all correctly jetted and fitted with the right slide cutaway for my 1947 KSS Mk2 engine. It seems that Velocette changed the carburation during the 1946/47 period, so careful inspection of the engine number is needed to get the right carburettor setup. Surrey Cycles are real experts with Amal carburettors.
Re-assembly of the engine was interesting, especially when making sure I had the correct valve timing via the bevel drive for the overhead cam. The eccentric spindles for the valve rockers make precise adjustment of clearances very easy and are another example of the superb engineering of the machine.
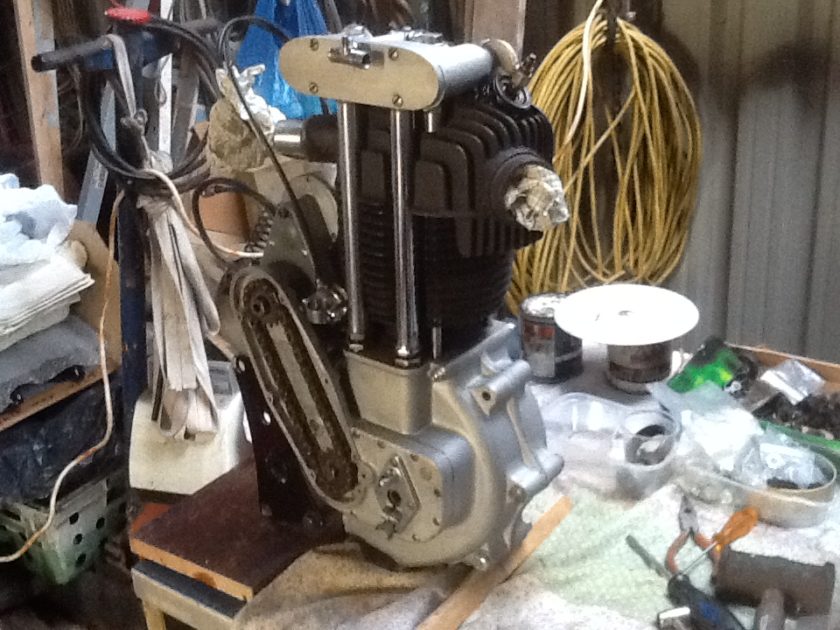
On starting the rebuilt engine, I could feel more compression and saw much less blue smoke from the exhaust, as I expected. I am sure the remaining smoke will diminish once the extra oil I added to parts as I reassembled the engine gets burned off and the new piston and rings bed in thoroughly. Unfortunately, with lockdown I have not been able to run the finished machine on the road very much, so it is yet to be fully run in.
Starting was still quite a challenge , so at this point I decided to have a good look at the magneto, which turned out to be the original BTH type fitted as standard. The Seller claimed to have had it rebuilt, but I became suspicious of this claim as the spark didn’t seem very healthy to me and the magneto casing didn’t look like it had been opened since 1947! I tried different brands of plug, including some Iridium types – but found the best results were obtained with a Brisk plug. In the end, I had the magneto completely re-built by Velocette Classics and the now re-vitalised unit has made starting very much easier, as well as giving a steadier tick over.
There are no electrics on this machine other than the magneto, so the dynamo and its drive had been removed by the previous owner and this left the shock absorber on the primary side of the crankshaft exposed and projecting through the primary case – rather dangerous and a source of considerable oil fling! I used an adapted food can to make a cover for the shock absorber. The primary casing was also leaking, so I opened it to fit a new gasket and at the same time, inspect the sprockets, primary chain and clutch assembly. The chain needed replacing but the sprockets were acceptable and the clutch also proved to be sound. The design of the Velocette clutch is certainly novel and requires careful adjustment using a very ordered process, a lesson I learned the hard way as I made several attempts to achieve the right setting. It was classic case of “When all else fails, read the Manual”…
Happy now with the engine and transmission, I started looking in detail at the rest of the machine. As a summary:
The forks stanchions were badly corroded, so I replaced the stanchions and all seals. The fork headstock had been modified with taper roller bearings which were rather dry, but when stripped, cleaned and lubricated, they came up like new. The steering damper needed new friction material and replacement adjuster. All parts were supplied by Royton Road and Race (http://www.roytonroadandrace.co.uk/), one of the last true back street workshops making quality parts for classic motorcycles. Full of lathes, milling machines, pillar drills, swarf, oil and years of experience – a proper workshop!
The ES2 oil tank was swapped for a central tank, also manufactured by Royton Road and Race. When changing the tank, I replaced all hoses and stripped/inspected the oil pump, which was very sound – as the good return oil flow had suggested.
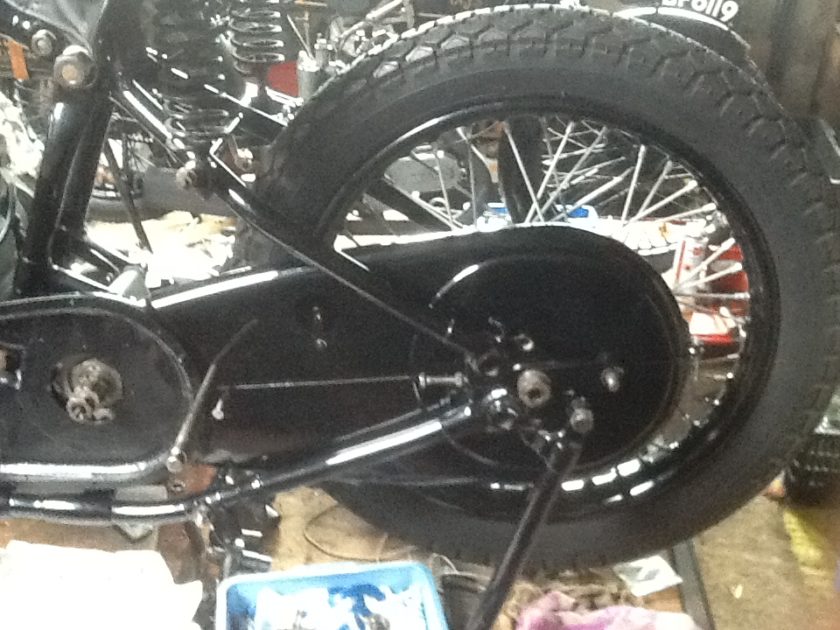
The wheels were in serviceable but poor order, so I kept the hubs and had Morad alloy rims fitted, changed all the bearings and swapped the standard 8” SLS front brake plate for a nice used but well-refurbished Commando TLS unit found on Ebay. The rear brake shoes were also re-lined and the mechanism serviced and lubricated. A new rear chain fitted was fitted.
Both mudguards were retained, but I re-fitted the rear using a seat loop extension to the back of the wideline frame, giving a much neater and cleaner appearance. The rear number plate holder is home made.
The frame was cleaned and touched in here and there, but left in its black finish. In places, there were glimpses of the original ES2 green finish from 1959. The swinging arm was found to be both straight and sound, so was simply cleaned, touched in and replaced in the frame.
The petrol tank that came with the machine was sound and in possession of nice patina in the form of scratches and a couple of “dings”, so I just changed the petcocks, gave it a light polish and re-seated it with Manx rubbers. Re-fitting revealed a potential clearance problem with the valve lifter mechanism on top of the KSS head, but a bit of careful “hammery-bashery” with my planishing hammer under the tank resolved that issue. The tank strap appears to have been hand made by the previous owner, as do the rearsets, gear change linkage and rear brake pedal system.
I was not sure what to call the machine. I toyed with NorVel but settled in the end for Norton KSS and a local firm produced the petrol tank decals for me accordingly.
The seat was changed for a standard Manx unit (hiding a tool roll in the seat hump like my Triton). I also added a flyscreen plus new tyres and a side stand from RGM Norton (https://www.rgmnorton.co.uk/) to complete the machine.
The final step was to obtain a V5 for the machine. This proved to be a major challenge, requiring much form-filling, email and phone calls with DVLA, plus endless patience , and in the end took over five months (!). I got there in the end however and the machine was assigned a 1959 registration based on the frame. My Insurers (Footman James
https://www.footmanjames.co.uk/) added the machine to my overall policy for a very reasonable sum.
Ready now for some Summer riding, lockdown permitting !
Robert White
St Helens
| This is the finished machine: |
Brian Moorcroft’s Projects
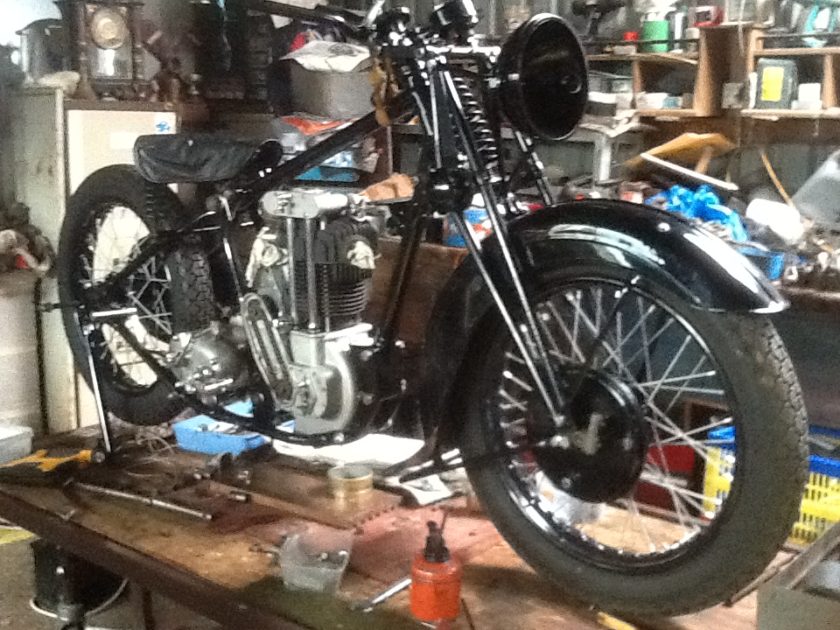
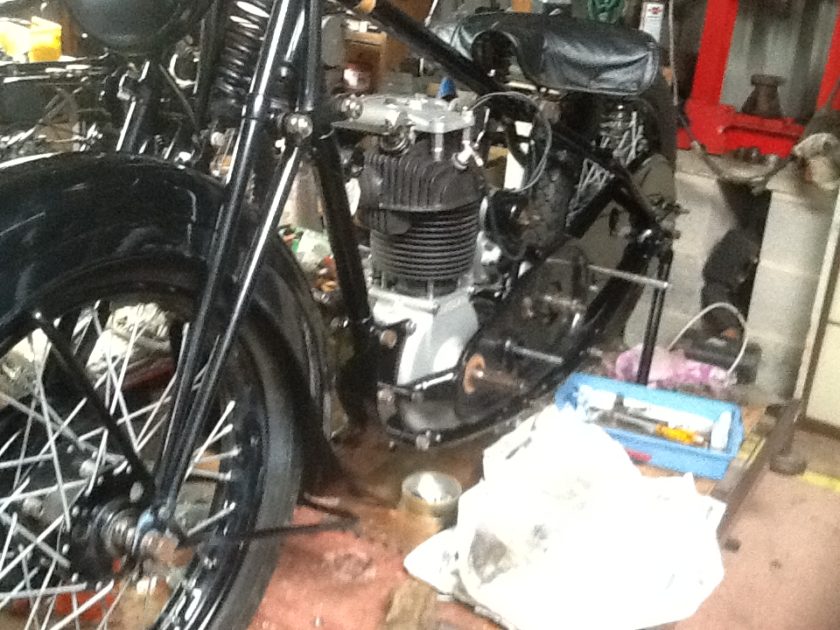
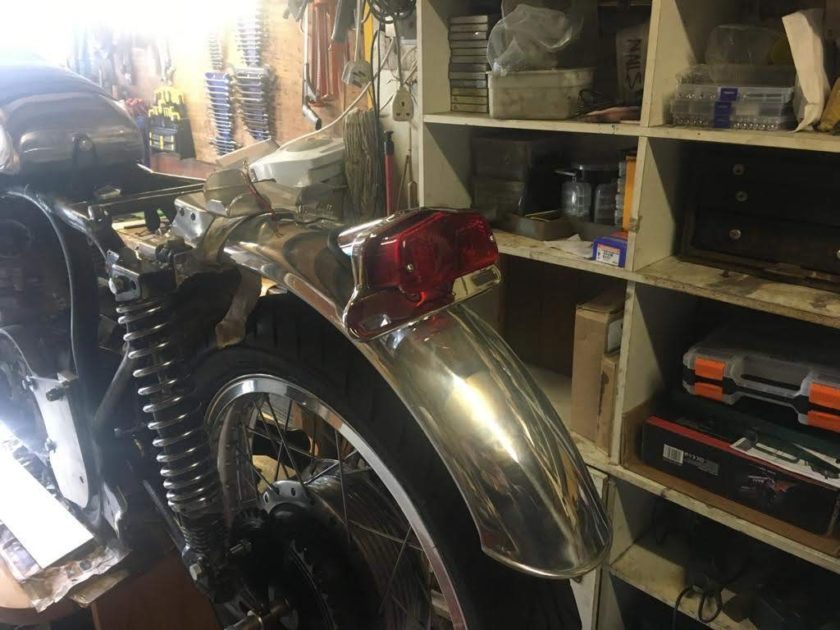
Brian Moorcoft has been busy as Alex mentioned last month and has sent us some pictures of his 1936 Model 9 500 Sunbeam project, that is almost finished:
John Graham Honda Project
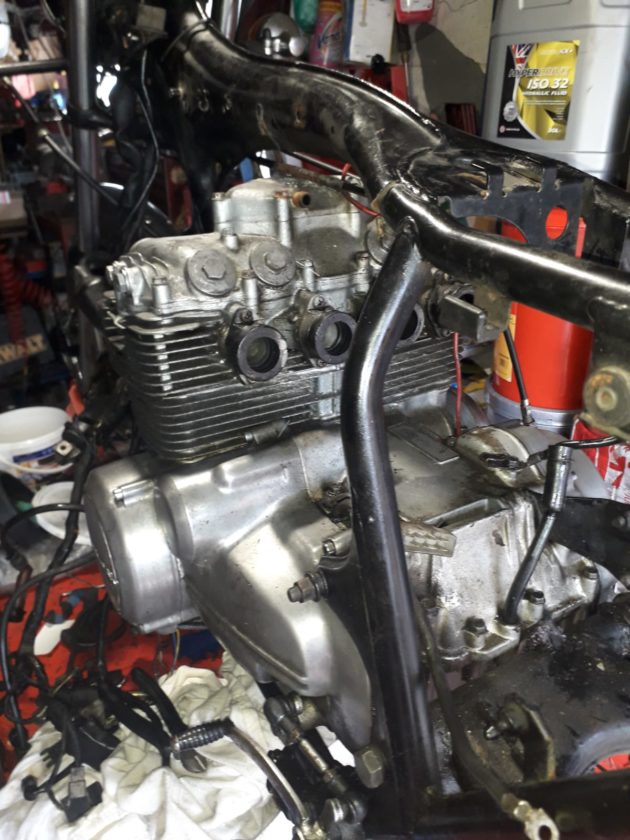
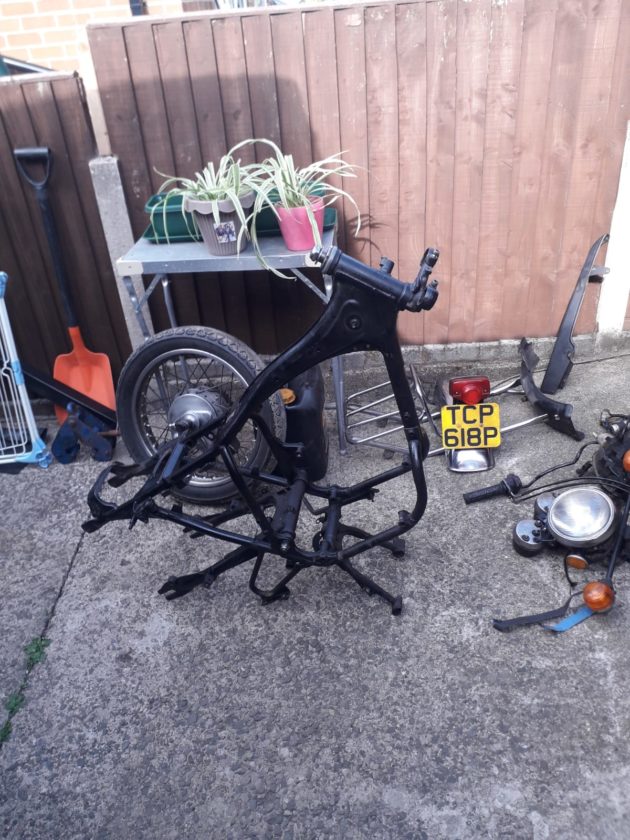
John Graham has kindly provided pictures of one of his projects a Honda 400 Four.
Angie got the bike 11 years ago off Barry Carter it was missing a seat carbs and was in poor condition. No front mudguard and the key switch was damaged. The front brake caliper was seized, big bro (Alex) gave me a BSA mudguard so we made it fit. I bought a new seat and sorted the carbs out, I also bought a new battery, serviced the bike and changed the handlebars and levers to suit Angie. Angie has got a few miles in and liked the bike, it was her first big bike after passing her test, then off to the Manx for ten days It was a good job we were in a homestay as it rained for 9 days solid, but give the girl her due out we went all over the Island. At one point we were coming back from Peel, it was 3 inches of rain so crawling back to Douglas. We stayed with a fireman in the homestay and every night he took our gear and dried it overnight ready for next day. What a nice guy.
See pictures of bike under restoration below:


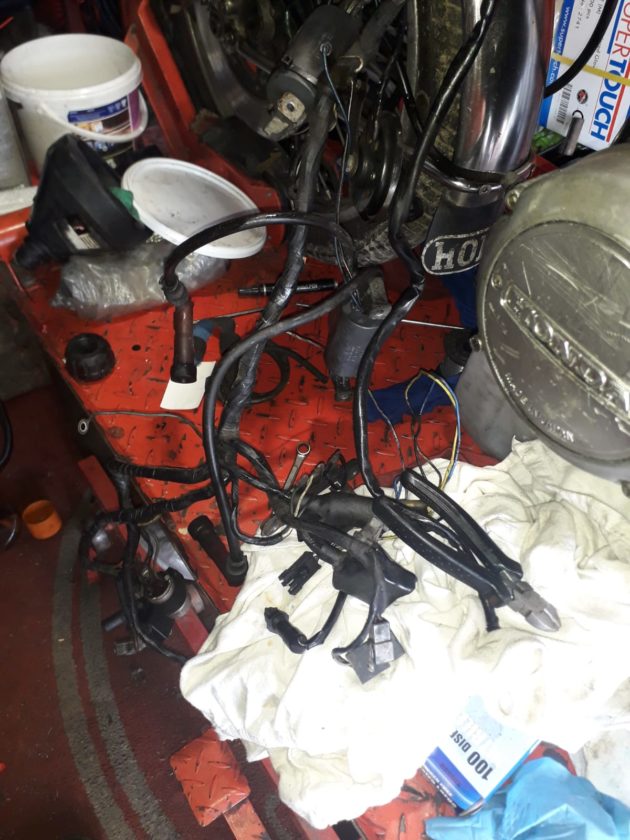

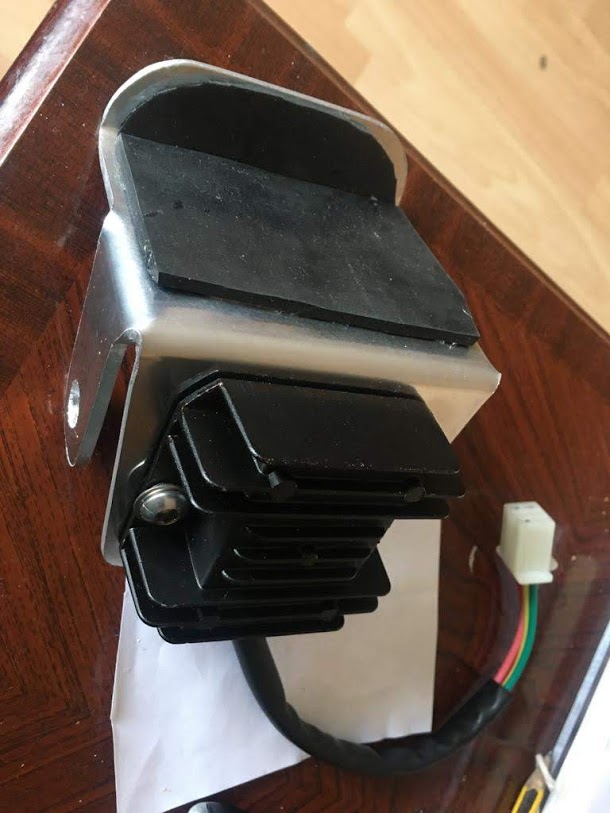
Gordon Williams Triton Project latest information
Gordon Williams has been continuing his restoration work on his Triton and I’ve attached pictures below of several items he’s had made and others he had welded. Next job is to finish his wiring, then cut out his aluminium sheet ready to form and weld his central oil tank.
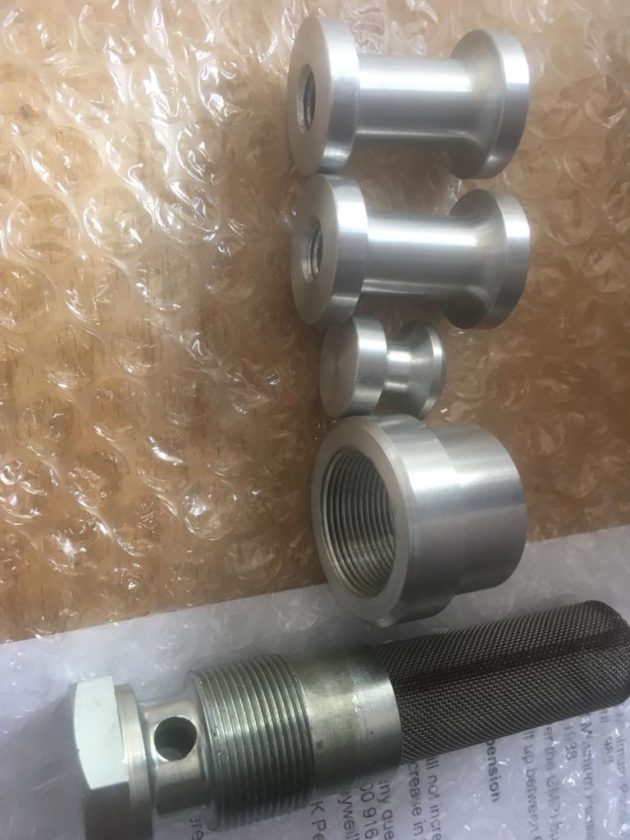

Gordon’s Triton is coming along nicely. This lockdown has been useful to allow him to time to concentrate on getting things done.
More pictures of Gordon’s Triton project below:


Brian Williams Triumph Legend TT
I, on the other hand have been painting everything that didn’t move around the house and garden including the full decoration of 3 bed rooms, painting the garage and shed (concrete garage and shed), driveway gates, garden furniture and even a sack truck. although I have done some jobs on my bikes.
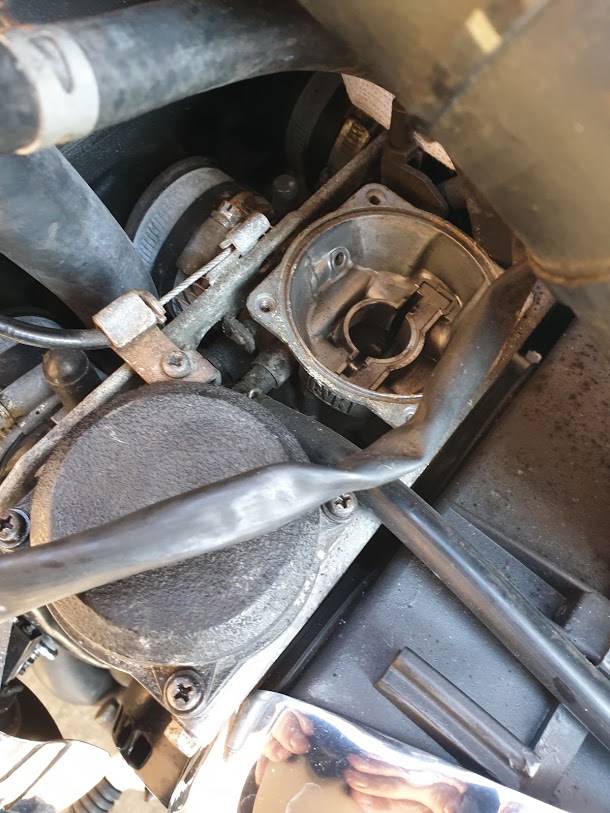
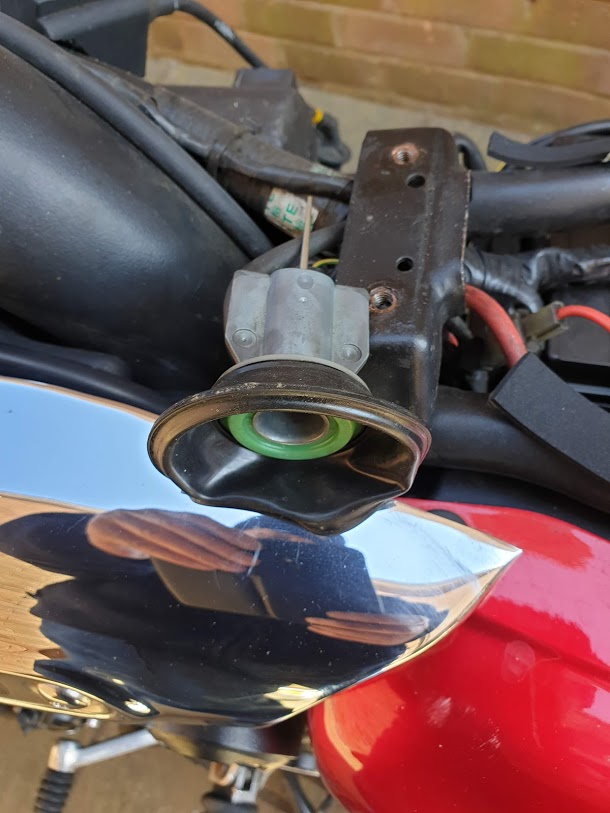
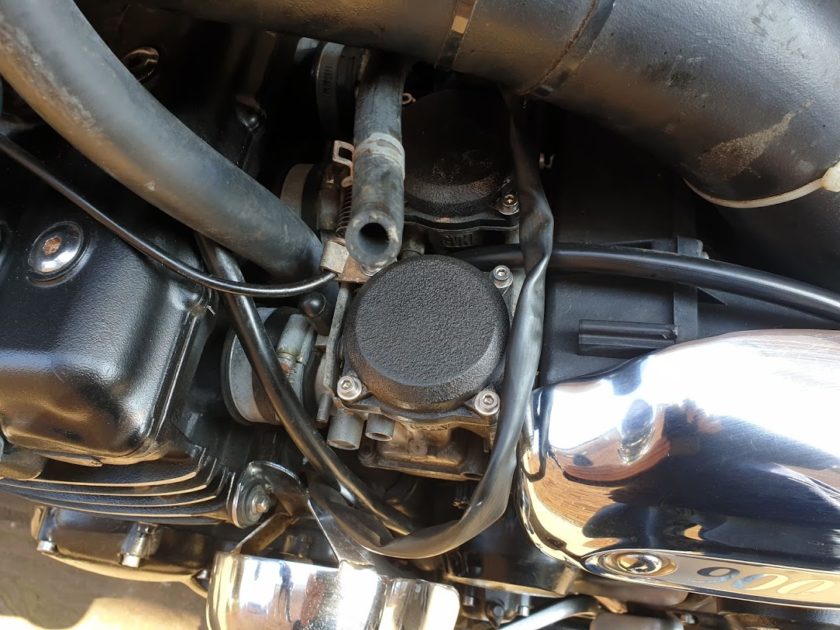
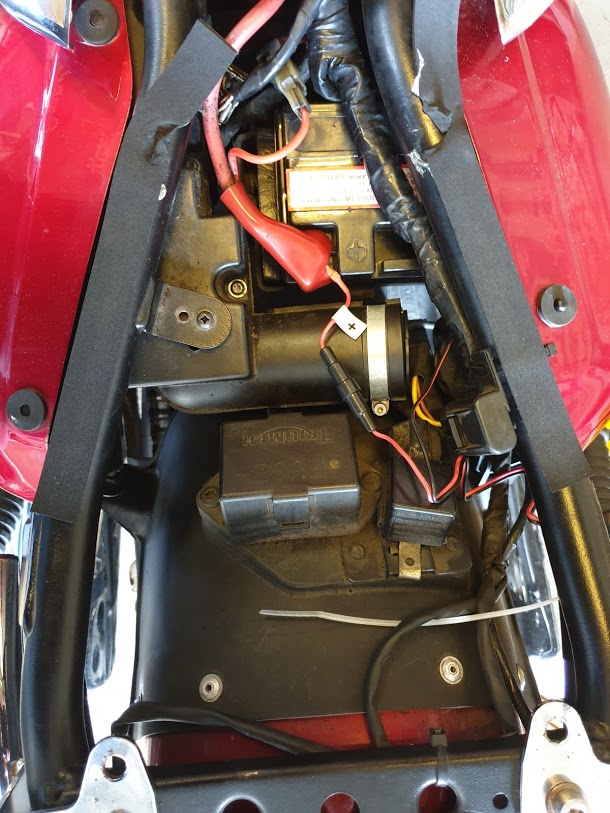
My Triumph Legend TT had a stutter lowdown and it required a little choke to get a smooth get away. I thought it might be the diaphragm on the Keihin carbs had a hole in it, so I took the seat and tank off and removed the slides/diaphragms and inspected diaphragms. No problem was found, so I cleaned them and applied WD and replaced the slides/diaphragms. Replaced tank and tested this seems to have sorted the problem, only a test ride will confirm this.
Whilst working on the Legend I also repaired the fractured RH exhaust silencer mount, which required a little welding. Next the rear disc caliper was binding so I removed the caliper from the disc and cleaned the caliper pistons and lubricated, this solved the problem of the binding rear brake caliper. Brian
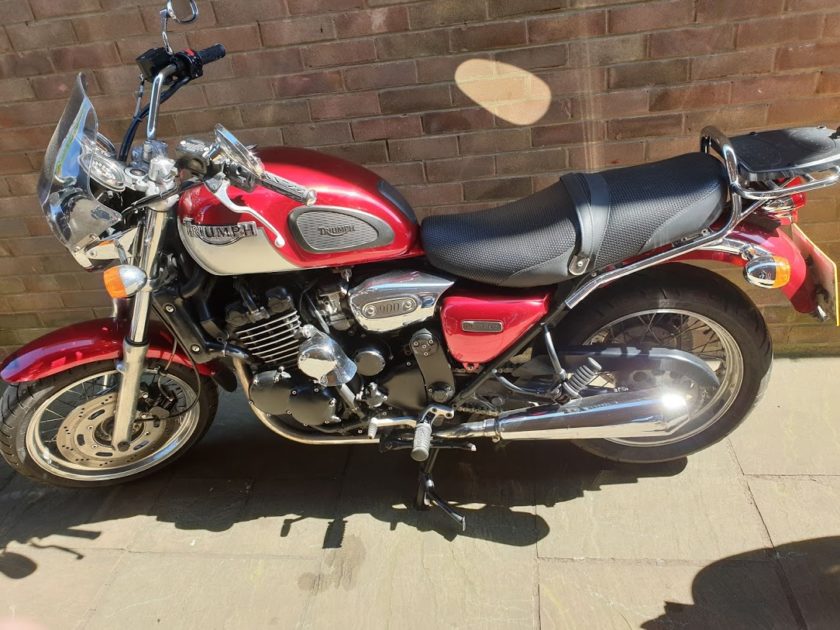


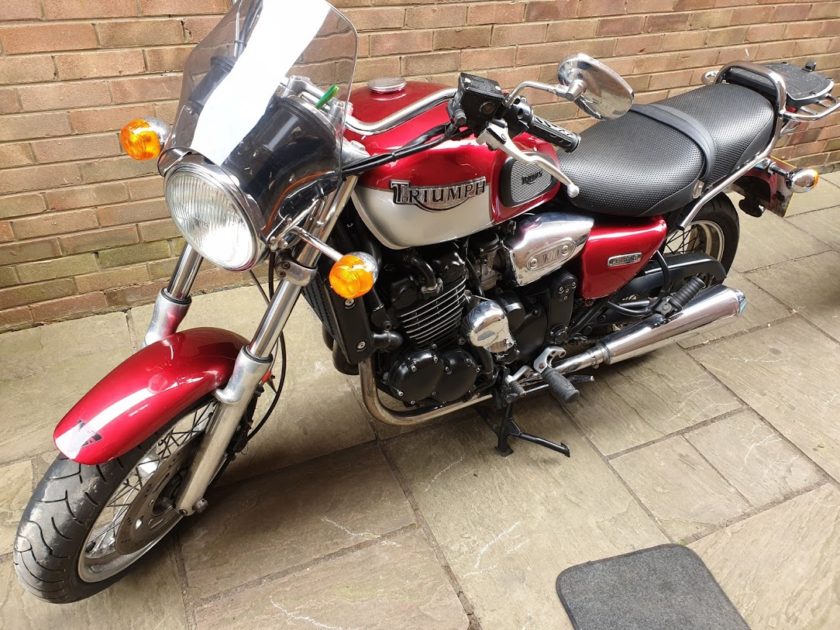
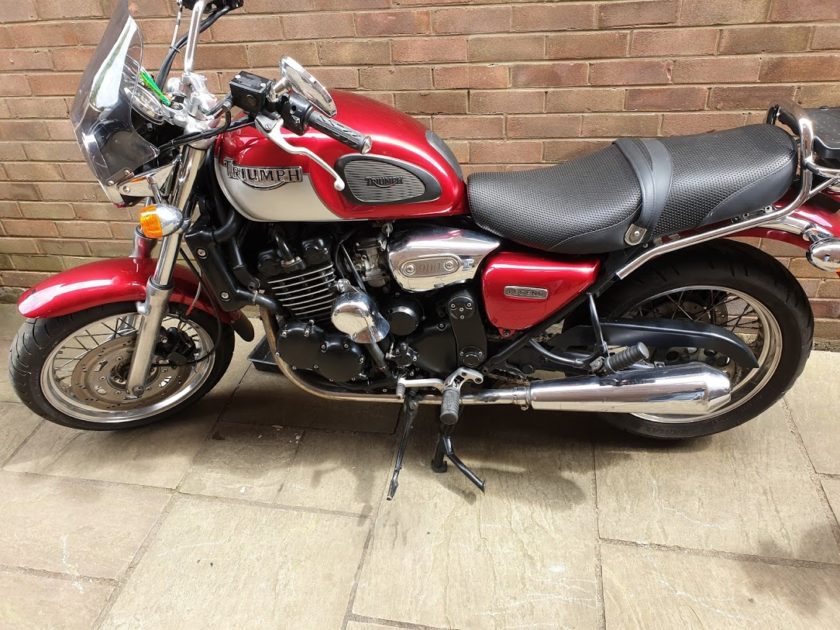
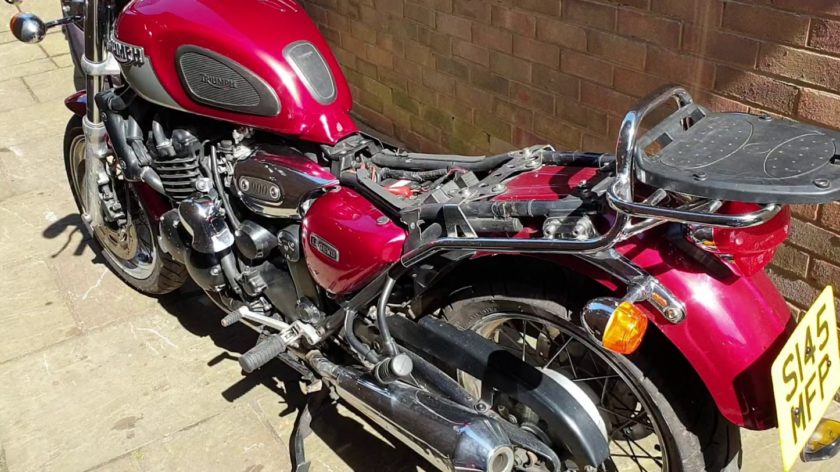
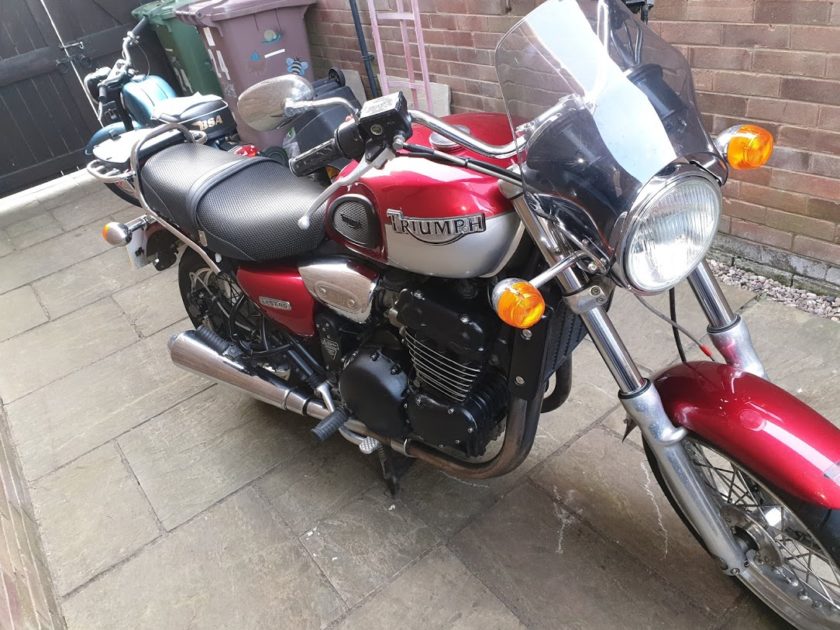

Triumph Legend has now been road tested and is running sweet as a nut. It pulls all the way from about 800rpm to 8000rpm, Parbold hill in top at 30 mph no problem.
Don’t forget we are interested in your projects:
I’m sure other members are just as occupied so let us know what you’ve been up to during the lockdown and we’ll include in the next newsletter. Without your projects we have no newsletter.
Thanks for your support. Alex